
JFrameとJPanelの組み合わせ(基本コンポーネントの拡張)
JFrameに直接コンポーネントを追加するだけでなく、JPanelを活用することでより柔軟なレイアウトが可能になります。JPanelはコンポーネントをグループ化 […]
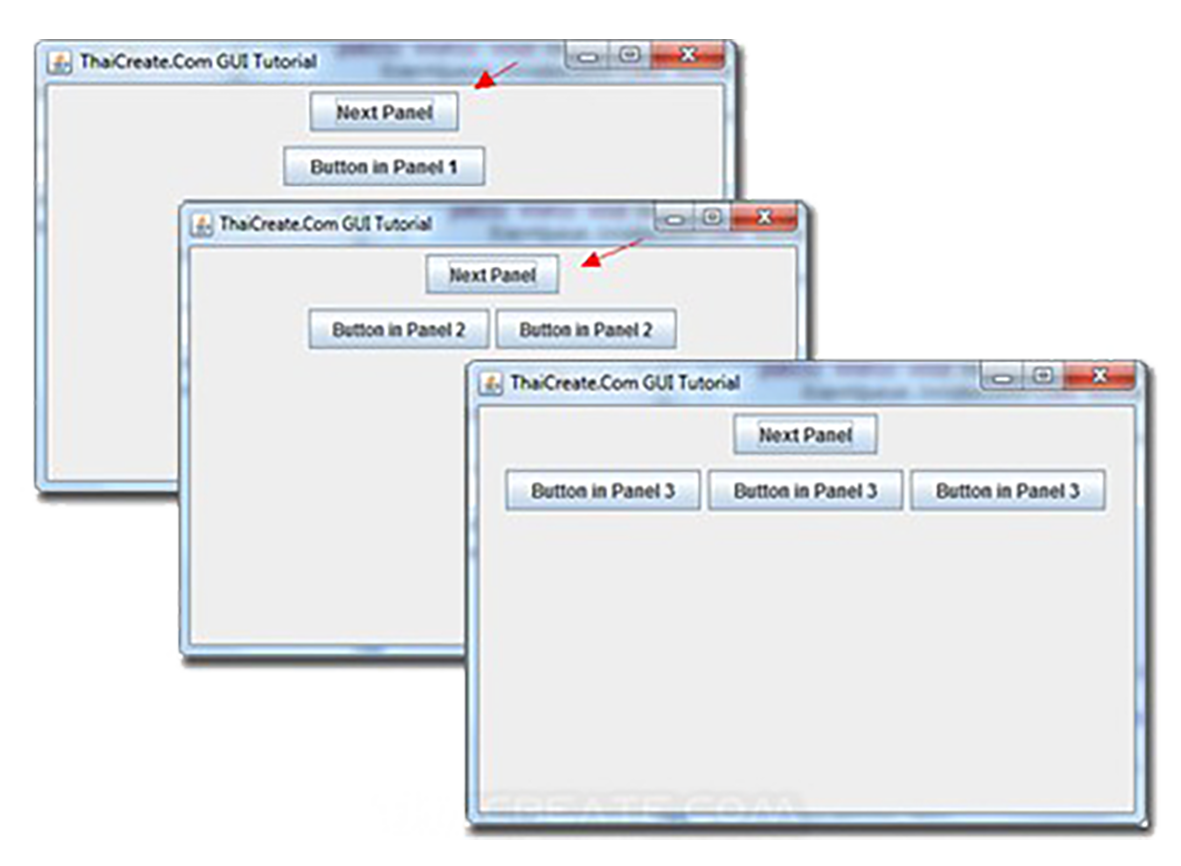
これまで学んだSwingの知識を統合し、複数画面を持つ本格的なアプリケーションを開発する方法を解説します。カードレイアウトを使用した画面遷移、データの受け渡し、アプリケーションのアーキテクチャ設計など、実践的な開発手法を紹介します。
import javax.swing.*;
import java.awt.*;
import java.awt.event.ActionEvent;

public class MultiScreenApp {
    public static void main(String[] args) {
        SwingUtilities.invokeLater(() -> {
            JFrame frame = new JFrame("複数画面アプリケーション");
            frame.setSize(800, 600);
            frame.setDefaultCloseOperation(JFrame.EXIT_ON_CLOSE);

            // カードレイアウトの設定
            CardLayout cardLayout = new CardLayout();
            JPanel mainPanel = new JPanel(cardLayout);

            // 各画面の作成
            MainMenuPanel mainMenu = new MainMenuPanel(cardLayout, mainPanel);
            LoginPanel loginPanel = new LoginPanel(cardLayout, mainPanel);
            DashboardPanel dashboardPanel = new DashboardPanel(cardLayout, mainPanel);

            // 画面をカードとして追加
            mainPanel.add(mainMenu, "MainMenu");
            mainPanel.add(loginPanel, "Login");
            mainPanel.add(dashboardPanel, "Dashboard");

            // 最初の画面を表示
            cardLayout.show(mainPanel, "MainMenu");

            frame.add(mainPanel);
            frame.setVisible(true);
        });
    }
}

// メインメニュー画面
class MainMenuPanel extends JPanel {
    public MainMenuPanel(CardLayout cardLayout, JPanel parent) {
        setLayout(new BorderLayout());

        JLabel titleLabel = new JLabel("メインメニュー", SwingConstants.CENTER);
        titleLabel.setFont(new Font("Meiryo", Font.BOLD, 24));

        JPanel buttonPanel = new JPanel(new GridLayout(3, 1, 10, 10));

        JButton loginButton = new JButton("ログイン");
        loginButton.addActionListener(e -> cardLayout.show(parent, "Login"));

        JButton exitButton = new JButton("終了");
        exitButton.addActionListener(e -> System.exit(0));

        buttonPanel.add(loginButton);
        buttonPanel.add(new JButton("設定")); // 仮のボタン
        buttonPanel.add(exitButton);

        add(titleLabel, BorderLayout.NORTH);
        add(buttonPanel, BorderLayout.CENTER);
    }
}

// ログイン画面
class LoginPanel extends JPanel {
    public LoginPanel(CardLayout cardLayout, JPanel parent) {
        setLayout(new GridBagLayout());
        GridBagConstraints gbc = new GridBagConstraints();
        gbc.insets = new Insets(5, 5, 5, 5);
        gbc.fill = GridBagConstraints.HORIZONTAL;

        JLabel titleLabel = new JLabel("ログイン", SwingConstants.CENTER);
        titleLabel.setFont(new Font("Meiryo", Font.BOLD, 20));

        JTextField usernameField = new JTextField(15);
        JPasswordField passwordField = new JPasswordField(15);

        JButton loginButton = new JButton("ログイン");
        JButton backButton = new JButton("戻る");

        // レイアウト配置
        gbc.gridwidth = 2;
        gbc.gridx = 0;
        gbc.gridy = 0;
        add(titleLabel, gbc);

        gbc.gridwidth = 1;
        gbc.gridy = 1;
        add(new JLabel("ユーザー名:"), gbc);

        gbc.gridx = 1;
        add(usernameField, gbc);

        gbc.gridx = 0;
        gbc.gridy = 2;
        add(new JLabel("パスワード:"), gbc);

        gbc.gridx = 1;
        add(passwordField, gbc);

        gbc.gridy = 3;
        gbc.gridx = 0;
        add(backButton, gbc);

        gbc.gridx = 1;
        add(loginButton, gbc);

        // イベント処理
        backButton.addActionListener(e -> cardLayout.show(parent, "MainMenu"));
        loginButton.addActionListener(e -> {
            // 簡易認証
            String username = usernameField.getText();
            char[] password = passwordField.getPassword();

            if (username.equals("admin") && new String(password).equals("password")) {
                cardLayout.show(parent, "Dashboard");
            } else {
                JOptionPane.showMessageDialog(this,
                    "ユーザー名またはパスワードが不正です",
                    "エラー",
                    JOptionPane.ERROR_MESSAGE);
            }
        });
    }
}

// ダッシュボード画面
class DashboardPanel extends JPanel {
    public DashboardPanel(CardLayout cardLayout, JPanel parent) {
        setLayout(new BorderLayout());

        JLabel welcomeLabel = new JLabel("ダッシュボード", SwingConstants.CENTER);
        welcomeLabel.setFont(new Font("Meiryo", Font.BOLD, 24));

        JButton logoutButton = new JButton("ログアウト");
        logoutButton.addActionListener(e -> cardLayout.show(parent, "MainMenu"));

        // タブ付きパネル
        JTabbedPane tabbedPane = new JTabbedPane();

        // タブ1: ユーザー情報
        JPanel userPanel = new JPanel(new GridLayout(0, 1, 10, 10));
        userPanel.add(new JLabel("名前: 山田太郎"));
        userPanel.add(new JLabel("メール: yamada@example.com"));
        userPanel.add(new JLabel("最終ログイン: 2023-11-15"));

        // タブ2: 設定
        JPanel settingsPanel = new JPanel();
        settingsPanel.add(new JCheckBox("ダークモード"));
        settingsPanel.add(new JCheckBox("通知を有効にする"));

        tabbedPane.addTab("プロファイル", userPanel);
        tabbedPane.addTab("設定", settingsPanel);

        add(welcomeLabel, BorderLayout.NORTH);
        add(tabbedPane, BorderLayout.CENTER);
        add(logoutButton, BorderLayout.SOUTH);
    }
}複数画面でデータを共有するための状態管理クラスを導入します。
import java.util.HashMap;
import java.util.Map;

public class AppState {
    private static AppState instance;
    private Map state;

    private AppState() {
        state = new HashMap<>();
    }

    public static synchronized AppState getInstance() {
        if (instance == null) {
            instance = new AppState();
        }
        return instance;
    }

    public void put(String key, Object value) {
        state.put(key, value);
    }

    public Object get(String key) {
        return state.get(key);
    }

    public void remove(String key) {
        state.remove(key);
    }

    public void clear() {
        state.clear();
    }
}

// 使用例
AppState state = AppState.getInstance();
state.put("currentUser", "山田太郎");
String username = (String)state.get("currentUser"); 商品管理システムの例で、複数画面間でのデータ連携を実装します。
import javax.swing.*;
import java.awt.*;
import java.util.ArrayList;
import java.util.List;

public class ProductManagementApp {
    public static void main(String[] args) {
        SwingUtilities.invokeLater(() -> {
            // サンプルデータ
            List products = new ArrayList<>();
            products.add(new Product("ノートPC", 120000, 10));
            products.add(new Product("スマートフォン", 80000, 15));

            JFrame frame = new JFrame("商品管理システム");
            frame.setSize(900, 600);
            frame.setDefaultCloseOperation(JFrame.EXIT_ON_CLOSE);

            CardLayout cardLayout = new CardLayout();
            JPanel mainPanel = new JPanel(cardLayout);

            // 商品リスト画面
            ProductListPanel listPanel = new ProductListPanel(products, cardLayout, mainPanel);

            // 商品詳細画面
            ProductDetailPanel detailPanel = new ProductDetailPanel(cardLayout, mainPanel);

            // 商品追加画面
            ProductAddPanel addPanel = new ProductAddPanel(cardLayout, mainPanel, products, listPanel);

            mainPanel.add(listPanel, "List");
            mainPanel.add(detailPanel, "Detail");
            mainPanel.add(addPanel, "Add");

            frame.add(mainPanel);
            frame.setVisible(true);
        });
    }
}

class Product {
    private String name;
    private int price;
    private int stock;

    public Product(String name, int price, int stock) {
        this.name = name;
        this.price = price;
        this.stock = stock;
    }

    // getters and setters...
}

class ProductListPanel extends JPanel {
    private JTable table;
    private ProductTableModel model;

    public ProductListPanel(List products, CardLayout cardLayout, JPanel parent) {
        setLayout(new BorderLayout());

        // テーブルモデルの作成
        model = new ProductTableModel(products);
        table = new JTable(model);

        // テーブル選択時の処理
        table.getSelectionModel().addListSelectionListener(e -> {
            if (!e.getValueIsAdjusting()) {
                int selectedRow = table.getSelectedRow();
                if (selectedRow >= 0) {
                    Product selected = model.getProductAt(selectedRow);
                    AppState.getInstance().put("selectedProduct", selected);
                    cardLayout.show(parent, "Detail");
                }
            }
        });

        // ボタンパネル
        JPanel buttonPanel = new JPanel(new FlowLayout(FlowLayout.RIGHT));
        JButton addButton = new JButton("商品追加");
        addButton.addActionListener(e -> cardLayout.show(parent, "Add"));

        buttonPanel.add(addButton);

        add(new JScrollPane(table), BorderLayout.CENTER);
        add(buttonPanel, BorderLayout.SOUTH);
    }

    public void refreshTable() {
        model.fireTableDataChanged();
    }
}

class ProductDetailPanel extends JPanel {
    public ProductDetailPanel(CardLayout cardLayout, JPanel parent) {
        setLayout(new BorderLayout());

        JPanel detailPanel = new JPanel(new GridLayout(0, 1, 10, 10));
        JLabel nameLabel = new JLabel();
        JLabel priceLabel = new JLabel();
        JLabel stockLabel = new JLabel();

        detailPanel.add(new JLabel("商品詳細", SwingConstants.CENTER));
        detailPanel.add(new JSeparator());
        detailPanel.add(new JLabel("商品名:"));
        detailPanel.add(nameLabel);
        detailPanel.add(new JLabel("価格:"));
        detailPanel.add(priceLabel);
        detailPanel.add(new JLabel("在庫数:"));
        detailPanel.add(stockLabel);

        JButton backButton = new JButton("戻る");
        backButton.addActionListener(e -> {
            table.clearSelection();
            cardLayout.show(parent, "List");
        });

        // 状態の監視と表示更新
        AppState.getInstance().addPropertyChangeListener(evt -> {
            if ("selectedProduct".equals(evt.getPropertyName())) {
                Product product = (Product)evt.getNewValue();
                nameLabel.setText(product.getName());
                priceLabel.setText(String.format("%,d円", product.getPrice()));
                stockLabel.setText(String.valueOf(product.getStock()));
            }
        });

        add(detailPanel, BorderLayout.CENTER);
        add(backButton, BorderLayout.SOUTH);
    }
}

class ProductAddPanel extends JPanel {
    public ProductAddPanel(CardLayout cardLayout, JPanel parent,
                         List products, ProductListPanel listPanel) {
        setLayout(new GridBagLayout());
        GridBagConstraints gbc = new GridBagConstraints();
        gbc.insets = new Insets(5, 5, 5, 5);
        gbc.fill = GridBagConstraints.HORIZONTAL;

        JTextField nameField = new JTextField(20);
        JSpinner priceSpinner = new JSpinner(new SpinnerNumberModel(0, 0, 1000000, 100));
        JSpinner stockSpinner = new JSpinner(new SpinnerNumberModel(0, 0, 1000, 1));

        JButton saveButton = new JButton("保存");
        JButton cancelButton = new JButton("キャンセル");

        // レイアウト配置
        gbc.gridwidth = 2;
        gbc.gridx = 0;
        gbc.gridy = 0;
        add(new JLabel("新規商品追加", SwingConstants.CENTER), gbc);

        gbc.gridwidth = 1;
        gbc.gridy = 1;
        add(new JLabel("商品名:"), gbc);

        gbc.gridx = 1;
        add(nameField, gbc);

        gbc.gridx = 0;
        gbc.gridy = 2;
        add(new JLabel("価格:"), gbc);

        gbc.gridx = 1;
        add(priceSpinner, gbc);

        gbc.gridx = 0;
        gbc.gridy = 3;
        add(new JLabel("在庫数:"), gbc);

        gbc.gridx = 1;
        add(stockSpinner, gbc);

        gbc.gridy = 4;
        gbc.gridx = 0;
        add(cancelButton, gbc);

        gbc.gridx = 1;
        add(saveButton, gbc);

        // イベント処理
        cancelButton.addActionListener(e -> {
            nameField.setText("");
            priceSpinner.setValue(0);
            stockSpinner.setValue(0);
            cardLayout.show(parent, "List");
        });

        saveButton.addActionListener(e -> {
            String name = nameField.getText();
            int price = (Integer)priceSpinner.getValue();
            int stock = (Integer)stockSpinner.getValue();

            if (!name.isEmpty() && price > 0) {
                products.add(new Product(name, price, stock));
                listPanel.refreshTable();
                nameField.setText("");
                priceSpinner.setValue(0);
                stockSpinner.setValue(0);
                cardLayout.show(parent, "List");
            } else {
                JOptionPane.showMessageDialog(this,
                    "商品名と価格を正しく入力してください",
                    "入力エラー",
                    JOptionPane.WARNING_MESSAGE);
            }
        });
    }
} // 国際化対応の例
ResourceBundle bundle = ResourceBundle.getBundle("messages");
JLabel label = new JLabel(bundle.getString("login.title"));
JButton button = new JButton(bundle.getString("login.button"));このような設計パターンを適用することで、保守性の高い複数画面アプリケーションを開発できます。次に進む「Swingアプリケーションのデプロイ」では、完成したアプリケーションを配布可能な形式にパッケージ化する方法を学びます。